Tuesday 15 October 2013

Chicken & Leek Stroganoff

Sorry for the lack of blog posts peeps.  You shall have to follow my Facebook page - I update it more regularly than this. My bad.  https://www.facebook.com/Wheatfreeandyum

So, today I called into the supermarket to grab some milk, ham, bananas and chicken breast as I was planning on making chicken schnitzels for dinner.  Walking through the fruit and veg department I saw some beautiful looking leeks on special -$1 each.  Instantaneously I thought of Chicken and Leek Stroganoff.  Yummo!  So that's what I came home to cook.  

I pay homage to Jamie Oliver who has this recipe in his Ministry of Food cookbook, however I wanted more veg in mine (to try to make up for the cream) so this is my version:

Ingredients - to serve 4

400g basmati rice (or rice of choice)
1 large leek
About a cup of chopped cauliflower
A handful of fresh green beans, chopped
A large handful or two of sliced mushrooms (I used button mushrooms - you can use your choice of mushrooms)
2 large chicken breasts, cut into small strips
About 30g butter
Olive oil
about 200ml of white wine
about 200ml of water
about 250ml of cream
salt & pepper
Small bunch of parsley - finely chopped, stalks and all
1 Lemon

Method-

Set your rice up to cook.  Don't ask me how - I'm hopeless at cooking rice in the traditional way so I always used my steamer to cook it.  Now I steam it in my Thermomix - 16 minutes and its perfect. :)

Cut your leek in half and wash well under running water - wash from the base to the leaves on an angle - with the leaves below the base so the dirt washes away.  Once it is all nice and clean, finely slice it.

Heat a little olive oil in a large frypan with the butter.  Add the leek, beans, cauliflower, salt & pepper, wine and water, stir then cover loosely with foil.  Let the mixture bubble away for about 5 minutes.


Remove the foil and add the chicken, mushrooms, cream and most of the parsley.  Bring to the boil, then turn down the heat and let simmer for approximately 10-15 minutes.


Just before serving, stir in the juice from half of your lemon.

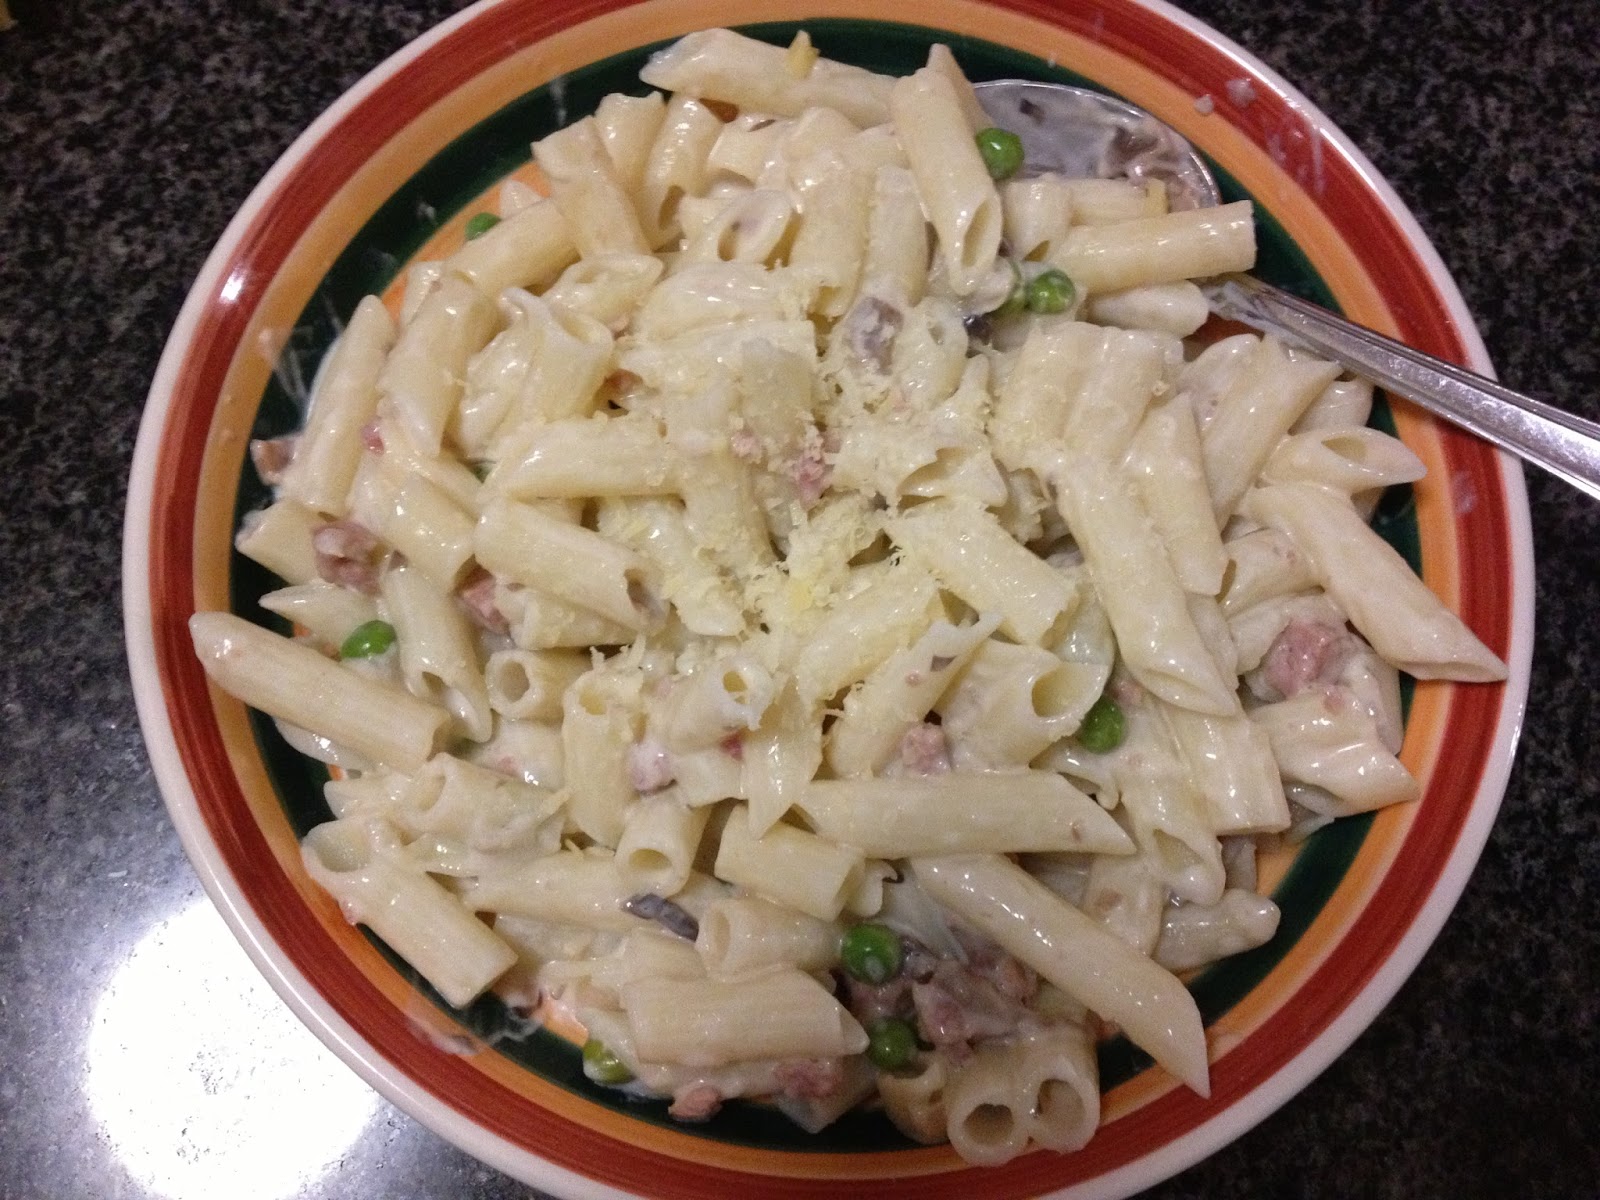
Serve over rice, with parsley scattered over the top and with a wedge of lemon.

Pure indulgent, deliciousness!


Thursday 5 September 2013

Chicken Meatball Stir Fry with Vermicelli Rice Noodles

I was given a copy of the Super Food Ideas magazine by my sister today and I saw a chicken meatball stirfry recipe which looked and sounded yummy.  BUT, I needed it to be wheat-free, I didn't have any snow peas, I didn't have any Chinese Red Wine and I didn't have any chicken mince, so I had to tweak it to suit me.

The chicken meatballs contain very similar ingredients to San Choy Bow except it uses chicken mince instead of pork.  They were super tasty.

Here goes:

Meatballs
500g chicken mince / 500g boneless, skinless chicken thighs
1 garlic clove, minced
1.5cm piece of fresh ginger, finely grated
1 can of water chestnuts, finely diced
2 spring onions, finely chopped
1/4 teaspoon sesame oil
1 tablespoon gluten free soy sauce
2 tablespoons gluten free oyster sauce
1/4 cup gluten free breadcrumbs
Rice bran oil for shallow frying

Stir Fry - see notes below
4 mushrooms - cut into quarters
1 large pak choy - cut into bite size chunks
1 can of baby corn spears (or a decent handful of fresh baby corn) - cut into bite size chunks
1 red capsicum - diced
1 clove of garlic - finely diced
1/3 cup of Chinese Rice Wine or Sherry
2 tablespoons gluten free soy sauce
200g rice vermicelli noodles

Method

Combine all the meatball ingredients, mix well and roll into small balls.  Refrigerate for at least 1/2 hour, preferably one hour.
Thermomix method: Place garlic, spring onions, ginger, water chestnuts and chicken thighs and pulse on turbo 5 or 6 times until a mince-like consistency is achieved.  Add breadcrumbs, sesame oil, soy sauce and oyster sauce and mix well - 20 seconds, speed 1.

Heat the rice bran oil and fry each meatball for approx 7-8 minutes until golden brown and cooked through. Set aside.

While the meatballs are cooking, prepare the vegetables for the stir fry.  Soak the vermicelli noodles in a bowl of warm water for 2-5 minutes, until softened.  Drain.  Using kitchen scissors, cut the noodles in halves or quarters (makes them easier to fry and to eat).

Once you have removed the meatballs from the fry pan, toss the stir fry vegetables in the pan and keep them moving.  Cook for approximately 3-5 minutes - until your preferred texture is achieved.  I like mine still a little crunchy and very colourful. Add the vermicelli noodles and the wet ingredients and toss.  

Serve the noodles and veg mixture into bowls and top with the meatballs.  Divine.

The meatballs were super tasty and the whole thing just worked.  I loved it.  

Note on Vegetables:
For extra vegetables or to make do with what you have in the fridge, you could use - the only limit is your imagination.
  • broccoli or broccolini
  • cauliflower
  • asparagus
  • zucchini
  • yellow button squash
  • snow peas
  • any asian greens
  • chilli - I think this recipe could really benefit from a sliced medium heat chilli thrown through

Cheers to Super Food Ideas (and my sister for giving me the magazine).  This is definitely something I will cook again!


Tuesday 27 August 2013

Egg free, wheat free pasta carbonara

Driving home from school today asking the kids what they feel like for dinner... Um, pasta. "Pasta carbonara?" pipes up Miss 10. So, pasta carbonara it was.

I had some super yum Rice & Quinoa penne in the cupboard - perfect.

First of all I put a pot of boiling water on the stove.

Carbonara Sauce:
300g diced bacon
3 large mushrooms
1 onion
2 cloves of garlic
1 stick of celery
1 block light cream cheese
1 tub Philadelphia Cream for Cooking (or 300g cream)
10g olive oil
                                          25g white wine
                                          1/2 cup frozen peas
                                          Parmesan cheese


I threw the garlic, onions and celery (onions peeled & halved, garlic peeled, celery roughly chopped) into the Thermomix speed 7, 5 seconds. Add oil and sauté (measuring cup off) 3 minutes, 100 degrees, speed slow. 
For those cooking in the traditional way: Finely chop the garlic, onions and celery and saute in oil over high heat until onion and celery are just softening.

While the onion mix is sauteing, slice all of the mushrooms. Add your pasta to the boiling water on the stove and cook until al dente.
Add the bacon and mushrooms to the onion mix and continue sauteing until mushrooms have softened and bacon is starting to crisp - Thermomix 100 degrees, 4 minutes, speed slow (measuring cup off)
Add the white wine and saute until the alcohol has cooked off - Thermomix 100 degrees, 4 minutes, speed slow (measuring cup off)
Add the cream cheese, cream and peas and stir until heated through and peas are cooked - Thermomix 100 degrees, 7 minutes, speed slow (measuring cup off)


 Strain your pasta and then stir through the sauce and serve with freshly grated parmesan.

A little decadent, but, hey, it has veggies in it, so its not all bad and I used lower fat options when it came to the cream and cream cheese.  Oh well, no harm in having a slightly "bad" meal every now and again :)

Yum!


Monday 26 August 2013

Cream cheese, chive, garlic & sundried tomato stuffed chicken breasts

OMG, just the name of this dish makes my mouth water.  It's a fantastic dish to wow your dinner guests without requiring too much effort.  Pretty easy really.  My family certainly enjoys it!

4 chicken breasts
1 block of cream cheese
2 cloves of garlic
decent bunch of fresh chives
4-5 sundried tomatoes (I used semi-sundried)
1 tomato sliced (optional)
few sage leaves (optional)

Stuffing mix:
Finely chop your garlic, chives and sundried tomatoes


 Add your cream cheese and mix well

Cut a poeket into each chicken breast.  Doesn't really matter where you do it or how, just be careful not to cut all the way through the breast - you just want a pocket.  I just used a paring knife. My chicken breasts were really big and plump so I cut them in half and then made a pocket.
Placed 1 - 2 heaped teaspoons of cream cheese mixture into each pocket of each chicken breast.  Don't overfill, just so its not spewing out of the pocket.
Place each breast in a lined baking tray and place a slice of tomato on top of each breast and 1 or 2 sage leaves (this is optional.  As you can see from my pic, I skipped the sage as my sage plant is not doing so great at the moment)
Bake in a hot oven (about 200 degrees) for approx 30-40 minutes, depending on the size of the chicken breasts.  Just gently slice your fattest chicken breast to check that it is cooked through (and serve that one to yourself lol)

I served mine with fresh steamed veggies, mashed pumpkin and potato wedges.  Homemade potato wedges are so easy to make!  Why not try it yourself? (instructions below)


Potato Wedges
Washed potatoes
Olive oil
Salt & pepper
mixed herbs (optional)

Scrub your potatoes well and slice into wedges - you can peel them if you like, but I like the skins left on mine
Place into a mixing bowl (I cheated and used a freezer bag cause I'm lazy, I wanted to save on washing up and I was storing them for cooking later in the day).  Add a decent lug of olive oil, a decent sprinkling of salt & pepper and a dash of mixed herbs.

Give it all a good mix up (or shake in my case) then spread them evening on a lined baking tray


Bake in a hot oven (200 degrees) for approx 40 minutes or until they are looking pretty golden and yum. Give them a turn or a shake about half way through cooking.
Voila: Perfect wedges ready to be served.  Divine with some sour cream and sweet chilli sauce!


Gluten Free Flour Mix

When I first started cooking wheat free, I just bought gluten free flour from the supermarket and off I went.  However, the results of my baking weren't great and the "aftertaste" was unpleasant - a bit of a baking powder or baking soda type aftertaste.
I have tried a few different blends, including one by Quirky Cooking (http://quirkycooking.blogspot.com.au/2010/12/gluten-free-gingerbread-men.html)

But my favourite is this:-

It is:

250g rice flour (I grind my own, using brown rice)
250g Tapioca flour (or Arrowroot)
250g cornflour
2 tsp potato flour
1.5 tsp xanthum gum

This is for plain flour.  For self raising flour, just add 1teaspoon of baking powder per 130g of plain flour mix.

I get great results from this gluten free flour mix. :)

Tacos!

Quick and easy, tasty and everyone loves them.  Tacos!!  Fantastic!
Mexican food is a great option for those on a wheat free diet.  So many options and usually quick and easy to prepare, tasty and a real crowd pleaser.

I don't like eating things that I can't pronounce so I make my own taco seasoning, simple:

Taco Seasoning:
2 teaspoons of chilli powder
1.5 teaspoons cumin
1.5 teaspoons paprika
1/2 teaspoon cayenne pepper (or a little more if you like it a bit hotter)
1 teaspoon onion powder
1 teaspoon garlic powder

This mix is enough for 2 taco meals.  Split it in two. :)


Tacos
500g minced beef
1/2 quantity of taco seasoning above
1 large onion
1 carrot
1 stick of celery
couple of mushrooms
1-2 cloves garlic 
1 small red capsicum (optional)
3 tomatoes
10g olive oil

Throw all the fresh veg in the thermomix and blitz - speed 7, 5 seconds 
If you don't have a Thermomix, traditional cooking method is listed below :)


Add oil, mince and taco seasoning and set Thermomix 25 minutes, 100 degrees, speed slow, reverse - leave the measuring cup off and place simmering basket on top to eliminate splatter

Drain excess liquid/fat (using the simmering basket) and transfer mixture to a serving bowl.

Layer meat mixture with sour cream, taco sauce, cheese, lettuce and tomato in your chosen wheat-free tacos or white corn tortillas and enjoy!

For those using the traditional cooking method:

Chop all veg finely.
Brown onions, garlic, celery and carrot in oil on medium-high heat
Add remainder of veg and cook until soft
Add mince and taco seasoning and cook until cooked through.  If the mixture becomes a little dry, just add a dash of water. :)

Gluten free Rock Cakes

Rock Cakes - aren't they just the best?  I LOVE them and they bring back so many childhood memories.  I could eat them all day.  I want my lovely little boy to enjoy them too, so off I went experimenting to come up with wheat free, egg free rock cakes that taste just as good as the "real deal".  It worked.  The first batch I made, poor little Mr B didn't even get to try them as his father and I ate them all in one movie sitting!  Piglets, I know, but seriously, these are good!

I used apple sauce in this recipe in place of an egg.  I also used the Thermomix, cause really, why would I chop everything up and make apple sauce and a mess on the stove?

Pre-heat oven to 180 degrees

Applesauce:
1 granny smith apple
20-30ml water

Peel and core apple, throw in the Thermomix and chop - Closed lid position - 2 - 3 turbo pulses
Add water
Set 100 degrees, speed slow, 8 minutes

Set aside

Rockcakes:
225g Gluten free self raising flour (I used my own blend) http://www.wheatfreeandyum.blogspot.com.au/2013/08/gluten-free-flour-mix.html
110g butter
85g white sugar
pre-made applesauce
100g raisins
25ml milk
extra sugar for sprinkling

Mix the flour, sugar and butter together until it resembles fine breadcrumbs (Thermomix speed 6, 10 seconds)
Add remaining ingredients and mix to combine (Thermomix closed lid, knead 30 seconds)

Spoon heaped teaspoons onto a lined baking tray and sprinkle with sugar (optional)

Bake in moderate oven 20-25 minutes - until just golden on top


Enjoy!

Gluten free Lasagne - Thermomix

I am going to share my recipe for gluten free, egg free lasagne.  I used my Thermomix for this and this recipe is one where the Thermomix really shines.  Lasagne is no longer a time consuming, messy recipe.  I can whip one up and have it in the oven cooking within about 45 minutes, with 2 jugs to wash up and both are dishwasher safe.  Happy days!!  But, if you're not lucky enough to own a Thermomix, you can just cook the bolognese sauce and bechamel sauce in the traditional way on the stove.

Ok, first up, we need a heap of veg and herbs:

 For the Sauce:
Bunch of fresh herbs (I used basil, parsley & oregano)
Couple of mushrooms
1 Zucchini
1 carrot
1 large onion
Couple of cloves of garlic
1 Stick of celery
(You can add some chilli or capsicum too)
15g olive oil
500g beef mince (or pork or a mixture of the two)
Couple of tablespoons of tomato paste
Can of diced tomatoes
Can of Heinz Big Red Tomato Soup (optional, could substitute with passata)
Dash of red wine

Sauce Method
Roughly chop the fresh veg and throw the whole lot into the Thermomix together with the herbs and garlic

Blitz on Speed 7 for 5 seconds


Add olive oil and mince (I break the mince up a little with the spatula when I put it in).
Set at 100 degrees, speed slow, 10 minutes - leave the measuring cup off and sit the rice basket on top to avoid splattering

Go do something else for 10 mins - I brought in my washing :)

Add tinned tomatoes, canned soup (or passata), about 50mls of red wine & tomato paste
Set at 100 degrees, speed slow, 20 minutes - again, leave the measuring cup off and sit the rice basket on top.


Grease a suitable baking tray and then go do something else for 18 minutes - I made the kids' lunches for the following day :)

Transfer sauce mixture to a jug or bowl

Don't bother cleaning the Thermomix jug - just get right into making the bechamel sauce:

Bechamel Sauce
50g cornflour 
50g butter
500g milk
pinch of nutmeg
salt & pepper

Throw all the ingredients into the thermomix.


Mix it all together - 7 seconds, speed 5
Set for 90 degrees, speed 4, 8 minutes

Start layering your lasagne: I used San Remo Gluten Free Lasagne sheets and layered as follows:
Layer of sauce,
Layer of pasta sheets,
Layer of sauce
Sprinkle of grated cheese
Layer of pasta sheets
Layer of sauce  - and so on until you run out of sauce and/or sheets

By the time you have layered the lasagne, your bechamel sauce should be ready
Pour the bechamel sauce in an even layer over the top of your lasagne
Sprinkle some more cheese over the top
Pop the whole thing into the oven and bake for 45 minutes at about 190 degrees.  I usually place my lasagne dish on top of a lined biscuit tray to catch any drips (I'm all for trying to minimise mess and therefore cleanup)

Voila: Beautiful lasagne and I tell you what, if you tried some and could tell that it was wheat free, I'd be surprised!  It's very very good!


Sunday 18 August 2013

Gluten free Apple & Mulberry Crumble: GF, Egg free, sugar free

I was reading some posts on www.wholefoodsimply.com and found this fabulous recipe for Apple Crumble  - http://www.wholefoodsimply.com/apple-crumble/

I decided it looked pretty great so decided to make it, with a few tweaks of my own.

I basically used the original recipe however:-

  • I used almonds instead of walnuts because I just don't like walnuts.
  • I added some rolled oats to the crumble mix (and an extra 10g of butter)
  • I used a combination of granny smith, red delicious and pink lady apples. 
  • I added a whole heap of mulberries to the mix
  • I added 1 teaspoon of cinnamon to the fruit mix for a little extra sweetness of the good kind.  
  • I used normal dried, pitted dates as I didn't have medjool dates in the cupboard.
  • I cooked the whole lot in one large dish.

I made some gorgeous custard to serve it with and I got the thumbs up from the whole family.  This was simply delicious and, aside from the butter in the crumble (which can be substituted with coconut oil), this was a very healthy and naturally sweet dessert (well, it was until I added the custard). lol

Thanks wholefoodsimply!

Meatloaf with Barbeque Sauce : Gluten free, Egg free, Dairy free, sugar free

Early last year, during a visit to my in law's farm, my mother-in-law made us a gorgeous meatloaf with barbeque sauce.  It was delicious.  It was an old family recipe that was a favourite amongst the kids when my husband was growing up.  My mother-in-law let me take a photo of the recipe, stains and all.

I wanted to recreate this old recipe. It needed to be wheat and egg free and, preferably a little healthier.  The original recipe called for such things as sausage mince, instant coffee and brown sugar. Furthermore, my mother in law is now eating a wheat free, dairy free, sugar free diet.  Here is my adapted recipe:

For the meatloaf:

Handful of fresh parsley
Couple of sprigs of fresh thyme (optional)
2 onions
1 clove of garlic
500g good quality pork mince
500g good quality beef mince
2 teaspoons of curry powder
1 cup gluten free breadcrumbs
1 cup of water
Salt & Pepper

Firstly, finely chop the herbs, onions and garlic - I used my Thermomix (herbs and garlic - speed 7, 5 seconds.  Scrape down the sides of the bowl, add onions, set lid to closed position and pulse 2 or 3 times).


In a large bowl, add to the onion and herb mixture: the gluten free breadcrumbs, curry powder, seasonings, water and minces.


Using your hands, mix together all the ingredients.  Get right into it and mix it all really well.


Transfer the mixture to a lined baking tray and shape the mixture into a loaf


Pop into a 200 degree oven (390F) for 1/2 hour

Now, let's get onto the Barbeque Sauce

I used dates as the sweetener in this sauce as I wanted to avoid using sugar.  The original recipe called for brown sugar and I wanted to keep the caramel colour and add some sweetness.  I also doubled the original recipe as I wanted loads of sauce, but that's not essential - feel free to halve it.

1/2 cup dried pitted dates (you can use 1/2 cup of brown sugar if you like)
1 cup water (200g)
1 cup tomato sauce (240g)
1/2 cup Worcestershire sauce (120g)
4 tablespoons vinegar (50g)
Juice of 1 lemon

Firstly, you want to grind the dates down to mush.  I used my Thermomix - speed 9 - 45 seconds.  You could use a powerful blender/bamix or whatever suits.

For traditional cooking: Put the ground dates and all other ingredients into a saucepan, bring slowly to the boil and simmer for 5 minutes.

For Thermomix cooking: Add remaining ingredients to the ground dates - speed slow, 100 degrees, 8 minutes.

Barbeque sauce now done.  It will be a little runny, but don't worry, it thickens up nicely later. 

Back to the meatloaf

After the meatloaf has been cooking for 1/2 an hour, remove it from the oven.


Pour the barbeque sauce over and around it.


Place back into the oven for an additional 50 minutes.  You can remove it after 25 minutes, spoon the sauce back over the meat and continue cooking.  This is more important if you halved the sauce recipe.

After 50 minutes, remove the meatloaf from the oven.

Transfer the loaf to a slicing tray
You will be left with lovely thick and sweet barbeque sauce in the baking tray, ready to be spooned over your meatloaf slices.
Slice up the meatloaf
Serve with mash (I used mashed potato, pumpkin, carrot & sweet potato) and steamed greens and spoon the barbeque sauce over the sliced meatloaf.  Delicious!
Wheat Free & Yum!